Today I’m going to talk about the nitrogen deficiency I dealt with with the tomatoes I grow on the rooftop of the house in the city. I grow them in “pots” that I made out of sacks.
We’ll look at the conditions under which nitrogen trophenia developed and what the cause and treatment ultimately was.
Starting from tomato seeds
I sowed the tomato seeds in a seedbed in mid-April. The spring of 2022 in Athens had quite low temperatures. Because of this, I was late in sowing.
The seeds were purchased in a bag from an agricultural store. They were outdoor tomato seeds, not greenhouse seeds.
Two weeks later, the first seeds sprouted in the seedbed.
A month and a half later, the tomato seedlings had grown quite a bit and I started hardening them off by putting them out in the sun. The first few days only for an hour. Then for longer periods of time.
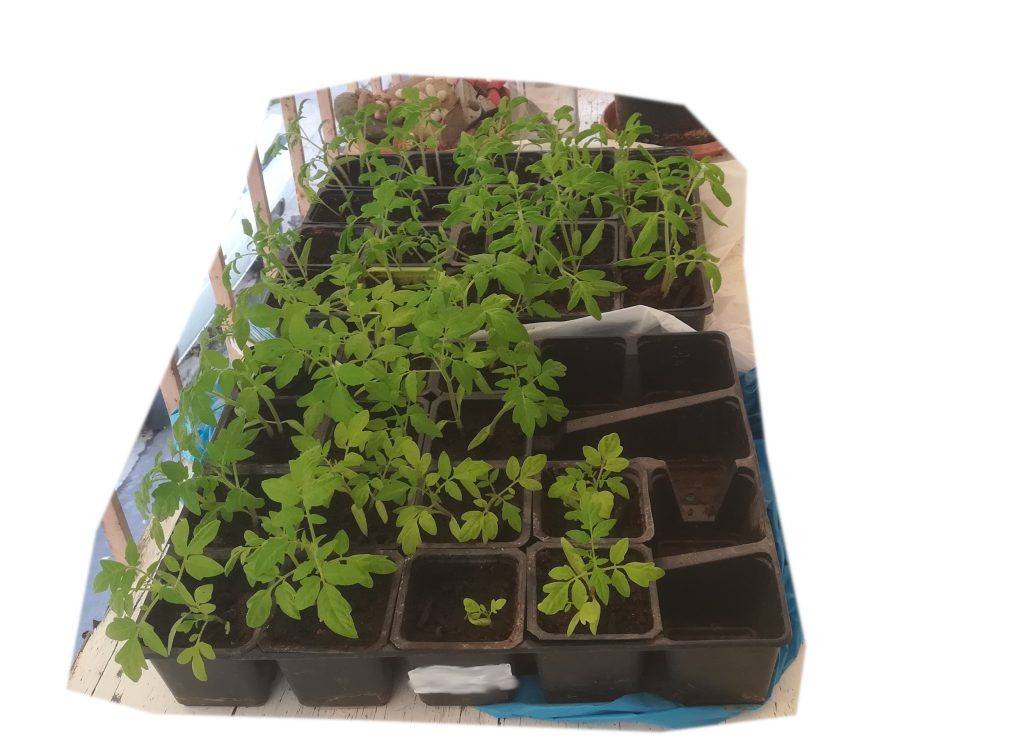
Their progress was very satisfactory.
Planting the tomato plants in the city in bags on the terrace
Two months after sowing, the tomato plants were ready for transplanting.
I had decided to transplant some of them into the garden and eleven of them, to keep them in the city of Athens and grow them on the roof of the house.
I would have to plant them in a container that would accept enough soil both in height and width to give them room to develop their root system.
The obvious solution would be to use large pots. Clay or plastic ones.
But I didn’t want to go to the expense of buying pots. Especially large ones like I needed. The cost would be too high and would make it economically unviable to grow tomatoes urban.
The next thing I thought of was planting bags. These would be a good solution as they are large and hold a lot of soil. But here too there was the disadvantage of cost.
I’m making alternative pots
The solution I came up with was patented. I would make my own alternative pots using cheap materials.
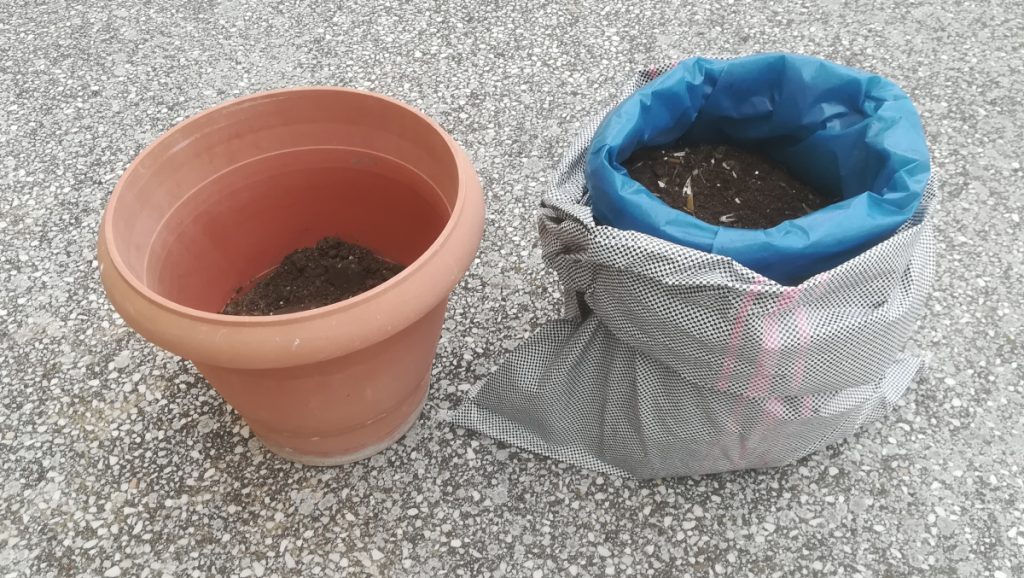
I picked up some rubble bags (blue in color) and olive bags (gray in color) from a store.

Inside the rubble bags, I will put the soil and then place them inside the olive bags.
The role that the olive sacks have in this patent is to act as protection from the sun. To protect the olive sacks from direct exposure to the sun’s rays.
The blue debris bags are thin. And they are translucent. If they were directly exposed to the sun for a few months, the following undesirable things would happen:
They would polymerize and disintegrate, prematurely destroying the pots.
Tomato roots would be exposed to sunlight, which is not good for the health of any plant root.
By putting the blue bags of soil inside the gray olive sacks, I protect the roots of the tomato plants from the sun, light, and sunlight.
The soil mixture
The next problem to be solved was the soil in which to plant the tomatoes.
I made a soil mix that would theoretically be very good and would ensure fast and great growth for the tomatoes.
I bought Floral Pot, special potting soil for all plants and pots in 20 litre packets.
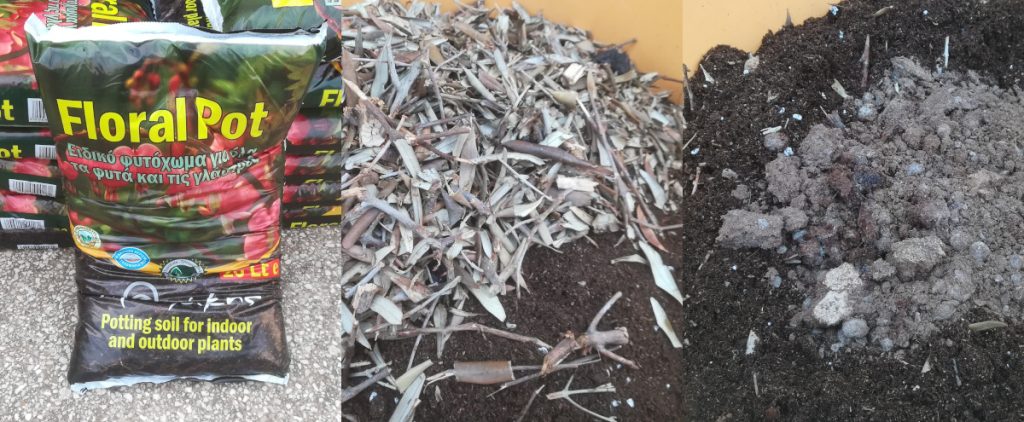
To make the soil mix, I mixed the plant soil well with goat manure and wood chips from olive cuttings.
The manure, as an organic fertilizer, would provide all the nutrients to the plants.
The olive wood chips would give the soil sufficient aeration and the ability to retain moisture from watering.
In theory, I had made a super soil for my tomato plants.
The final steps and transplanting
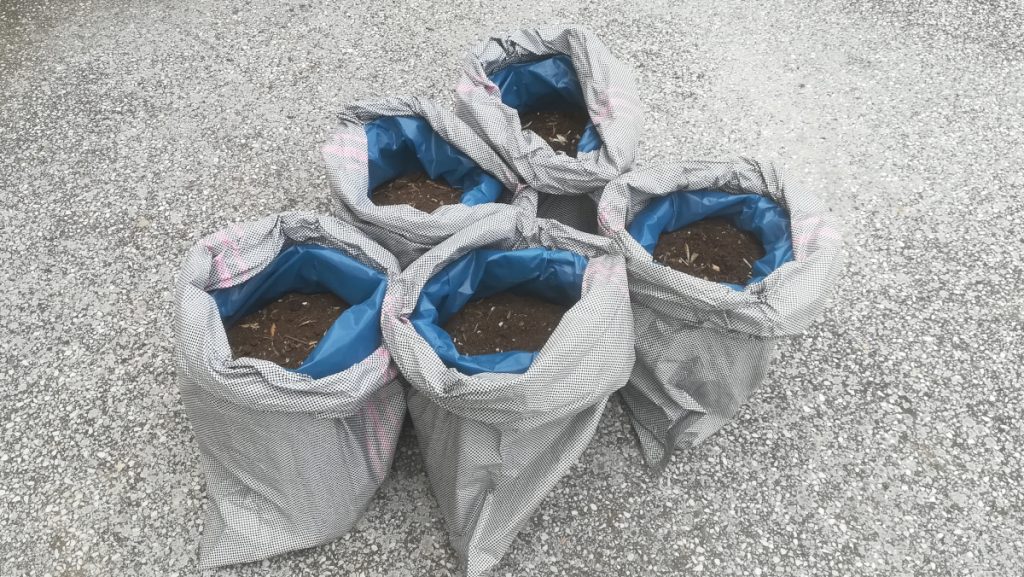
So I filled the blue rubble bags with the soil (soil mix).
I made several holes with a knife all over the body of the blue bags. The purpose is to allow excess water from watering to escape, but also to allow the soil to aerate.
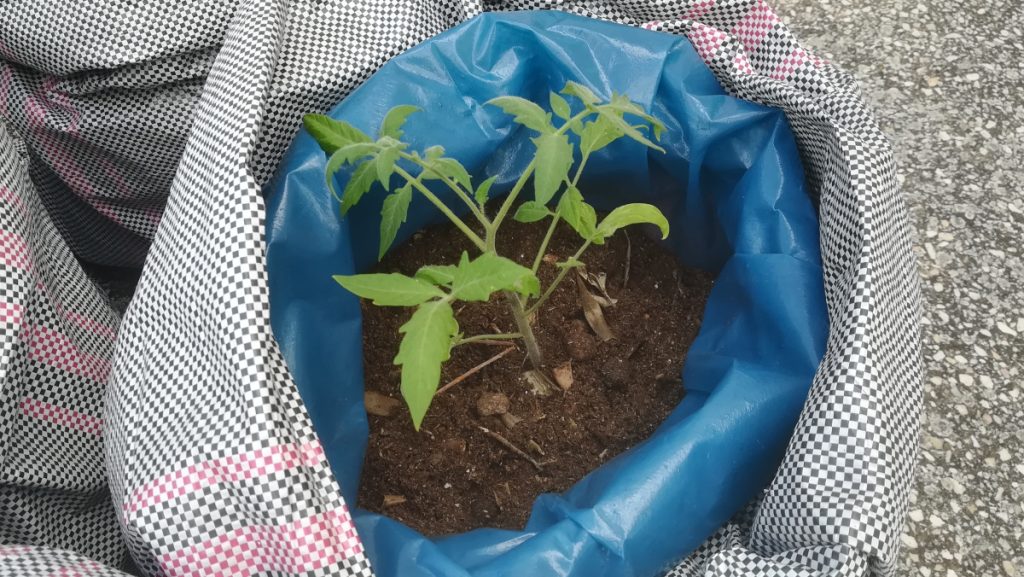
I transplanted the tomato seedlings as deep as I could so that they would develop a root system in the part of the stem that would be submerged in the soil.

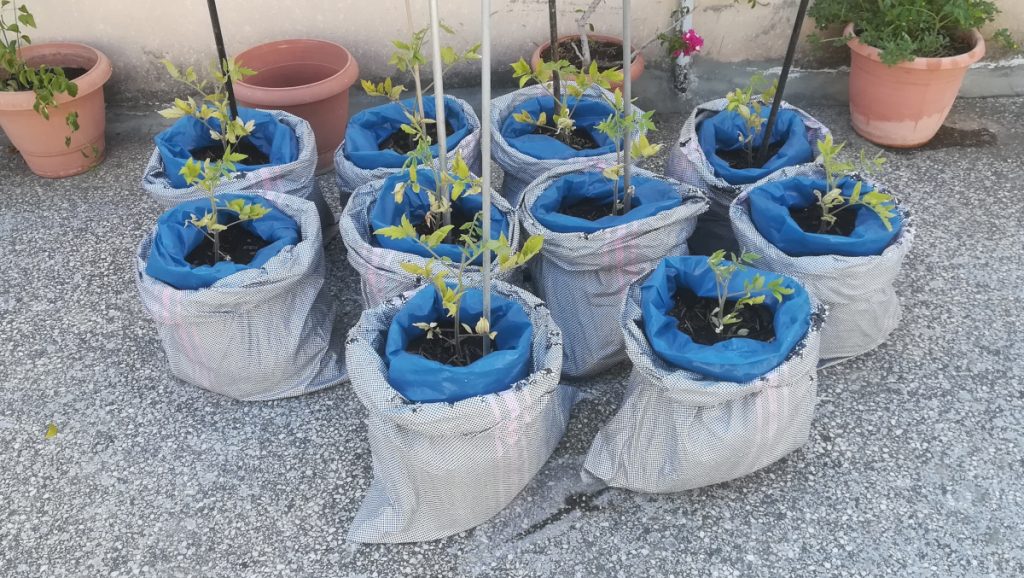
I put the blue sacks, inside the grey olive sacks and placed them next to each other on the roof. In a place where the sun would see them for at least 8 hours a day.
And it was time to wait for the tomato plants to grow!
Things are going wrong!
But unfortunately, the tomato plants’ progress was not as expected.
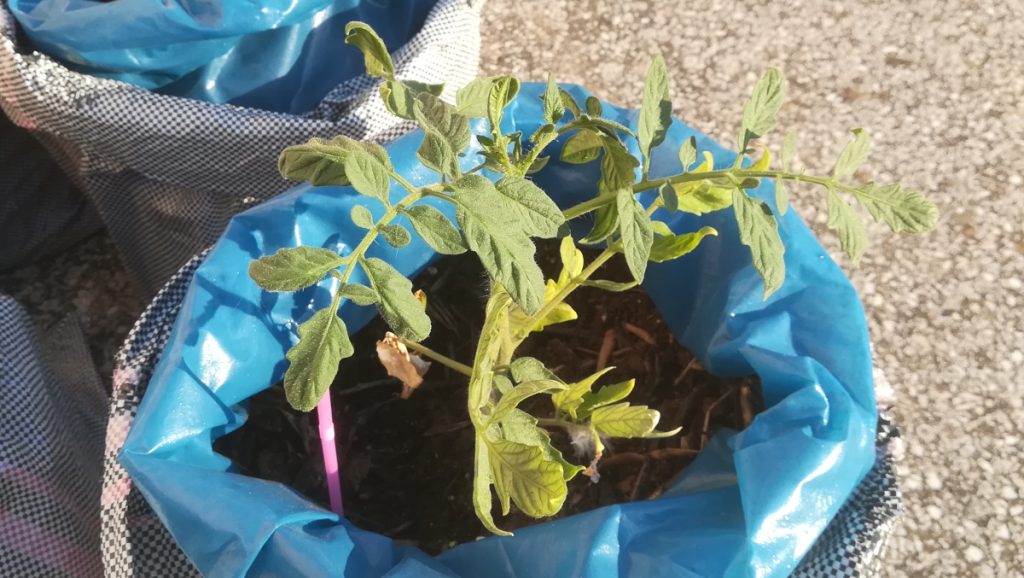
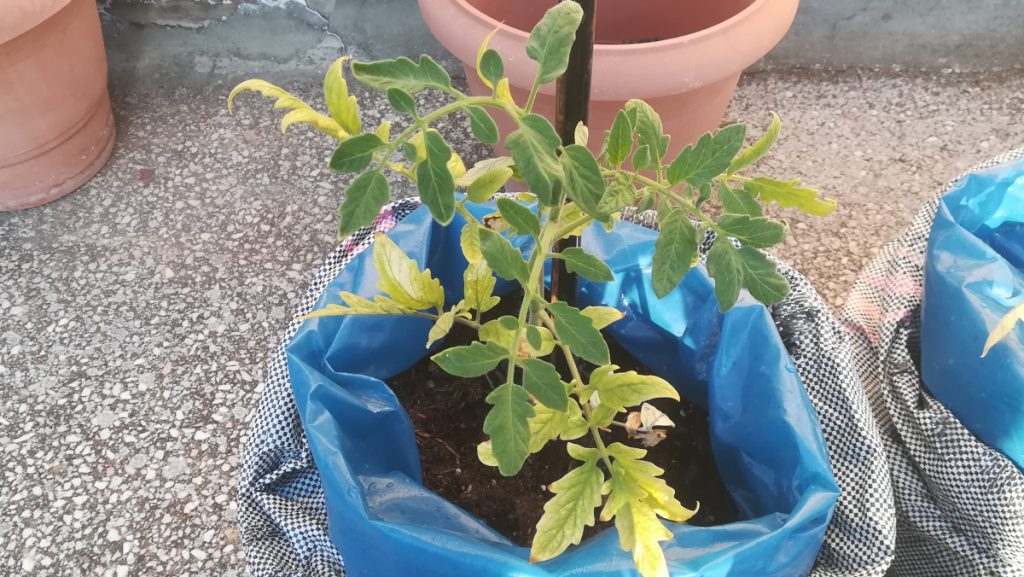
20 days had passed since transplanting and the picture of the tomato plants could only be described as tragic.
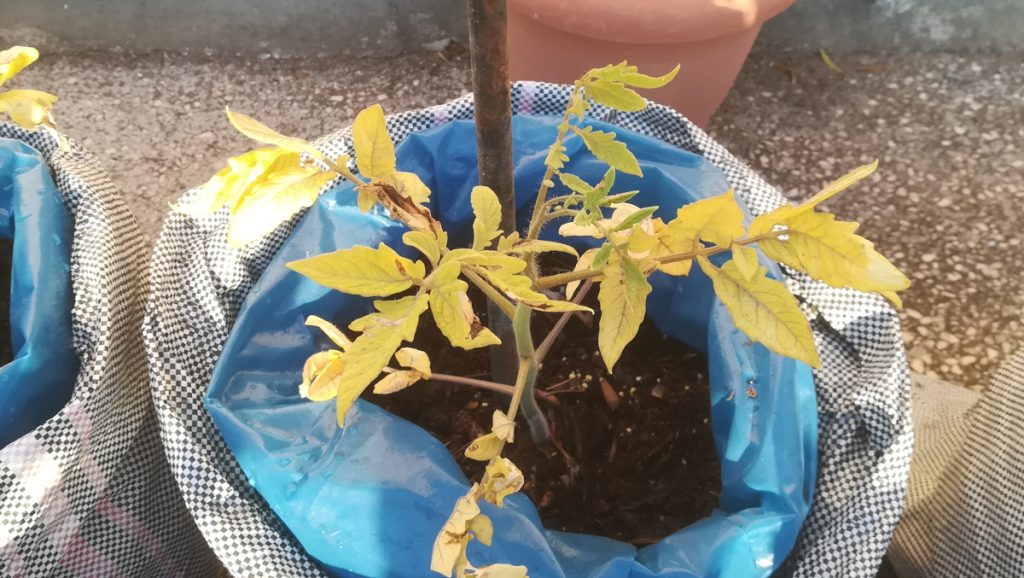
- They were growing very slowly.
- The leaves were yellow and looked slightly wilted.
- The vessels on the leaves were almost purple in color and were easily distinguishable, as if you were looking at an x-ray.
- The stem (trunk) was a color between light green and yellow.
Nothing like the appearance of a healthy tomato plant..
The speculations as to what could be to blame are many:
- The sun was burning the plants.
- Water from watering, pooling in the sacks and drowning the roots.
- The soil “boils” inside the sacks.
- I added too much manure to the soil mix and it burns the plants.
- And last, almost unlikely, nitrogen deficiency.
I first changed the location of the tomatoes, putting them on a part of the roof that got less sunlight for fewer hours.
I opened more holes in the blue bags.
None of this helped.
The tomato plants, continued to be yellow and not growing. Typical symptoms of nitrogen deficiency.
Treatment of nitrogen trophenia – The solution
As absurd as it may seem, tomatoes were suffering from nitrogen trophenia.
I couldn’t believe it as I had added goat manure, wood chips and bought special plant soil to the soil mix.
On four of the tomatoes, I added some 19-6-15 fertilizer (what do the numbers on the fertilizer mean?). The day before I added it, I watered the tomato plants. The next day, I dug up the soil, added some fertilizer away from the root. I stirred the soil to cover the fertilizer and watered lightly. Over the next few days, I watered normally.
Two weeks later, those 4 tomato plants made a huge difference for the better!
They were starting to grow and the leaves are green and healthy.
Turns out it was nitrogen deficiency!
Causes of nitrogen deficiency
The reason the soil mix didn’t have enough nitrogen, causing the tomatoes to have nitrogen trophenia, was the relatively fresh wood chips I had added to it.
The wood chips, made from olives, I had made about 3 months ago and they had not been composted.
Fresh wood chips when added to the soil, bind the nitrogen in the soil, making it unavailable to the plants.
This is what happened to my tomato plants on the roof.
The same will happen in the garden if you add fresh wood chips to the soil where you are growing vegetables.
Uncomposted wood chips fix nitrogen from the soil. They do so even if we spread them on the surface around our vegetables. They absorb nitrogen from the first few surface centimeters of soil. And this is not good for vegetables as they have a mostly surface root system.
Wood chips may fix nitrogen from the first few centimeters of soil when we surface spread them on the soil, but they increase the nitrogen content of the soil in depth. And this is very good for trees with deep root systems.
To use wood chips around your vegetables, you must first put a layer of compost or straw on top of the soil. On top of this, we can safely spread the wood chips.
I hope I have helped you by describing my experience.
Good luck with the crops!
Tags: CITY • DEFICIENCIES • NITROGEN DEFICIENCY • POT • POTS • TERRACE • TOMATO • TOMATOES • URBAN CULTIVATION • WOOD CHIPS