I build a raised garden of 1 square meter in Greece, with simple materials and test the possibility of growing in this garden.
Even if you have enough natural space to grow, the idea of growing in a controlled environment with the ideal soil is appealing.
This artificial garden is ideal for growing in the confined environment of the city. It can be placed on terraces or balconies. For a larger growing area, you can build as many of these gardens as you like.
So I started the experiment with the one square meter garden.
Dimensions of the raised garden
Width: 1 meter
Length: 1 meter
Height: 20 cm
Why a 1 square meter garden
For purely practical reasons.
The wood boards I found in the market had the following dimensions:
Length: 2 meters
Height: 10 cm
If I used the wood boards as they are, I would create an artificial garden with a surface area of 4 square meters and dimensions of 2 x 2 meters.
Although it looks attractive, an artificial garden with these dimensions would have the following problems:
- You would not be able to access the plants and fruits that would grow in the middle.
- You would need a lot of soil to fill it in. If you buy the soil, then it would be an expensive solution.
By cutting the wood in half, you make a garden that measures 1 x 1 meter or 1 square meter. You can have easy access to all the plants. You need ¼ of the soil.
Assembling the raised garden
I bought 4 2 meter boards and 4 stakes for the corners.
I cut the boards in half and now I have everything ready for assembly.

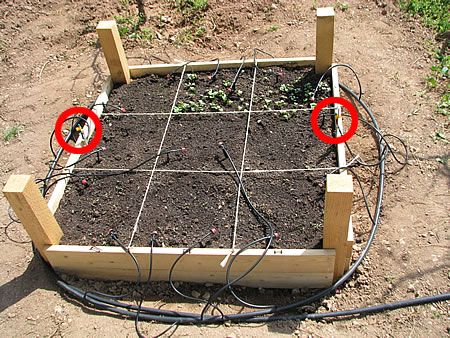
I assembled the wood boards to make a frame, as shown in the next photo.
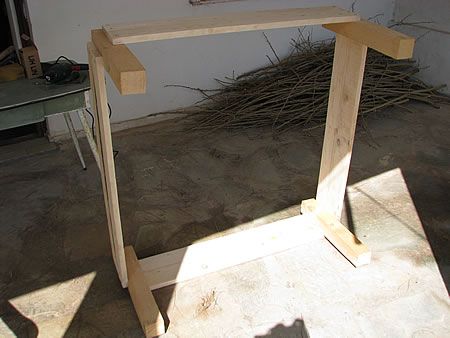
The stakes are placed at the corners and strengthen the frame. On top of the stakes I screwed the boards. I chose to screw rather than nail the garden frame boards so that I could easily unscrew them if needed in the future.
The only point that needs attention is to leave a small foot at the bottom so that the garden frame can be secured to the earth. In other words, the stake at the bottom should stick out about 5 cm.
Preparing the site for the raised garden
I chose to place the raised garden in a part of the garden that has plenty of light, but that I would not otherwise use.
Normally and for best results, you should fill the raised garden with light, fluffy and nutrient-rich soil.
Since I was going to set up the 1 square meter raised garden in the garden, I decided to “cheat” to bring the cost down.

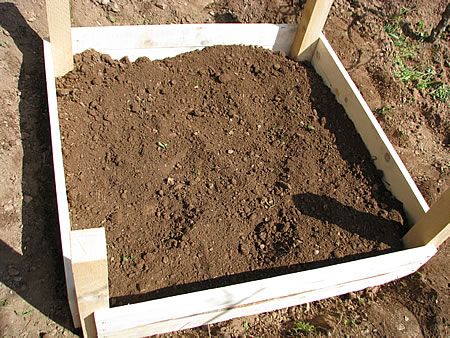
So I dug an area a little larger than a square meter.
I removed as much soil as I could and placed it on a cart.
As much soil as I couldn’t fit in the cart, I dug it over and over again to make it fluffy.
I removed as many weeds as I could find in the soil.
I’m preparing the one-square-meter raised garden
I placed the frame in the garden.
I tapped the 4 corner stakes so that they would go into the soil (the 5 cm left…)
I couldn’t afford to fill the whole frame with good quality compost. So I used soil and compost in layers.
First, I used a rake to spread the well-dug and fluffy soil so that it would spread all over the frame.
Next, I filled the frame with a layer of compost.
I used 4 50 liter compost bags. I spread the compost evenly.
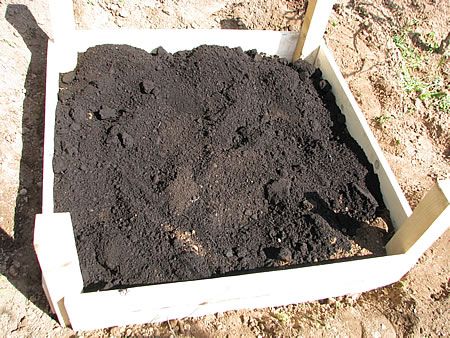
Then I added another layer of the soil I had removed and spread it with the rake.

The last top layer is again compost. I poured a 50 liter bag of compost and spread it evenly.
The top of the garden will now be black.
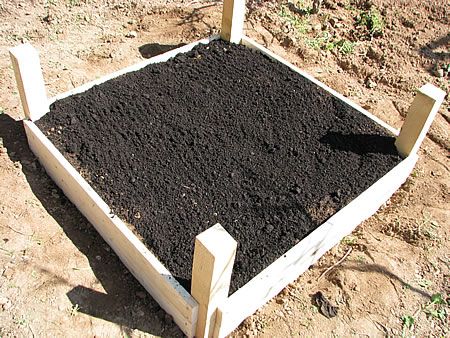
I used a watering can and watered the soil.
I divide the area of the raised garden into areas
I’ve seen it on TV shows. I’ve seen it in blueprints. I’ve seen it on the internet, so I tried it myself.
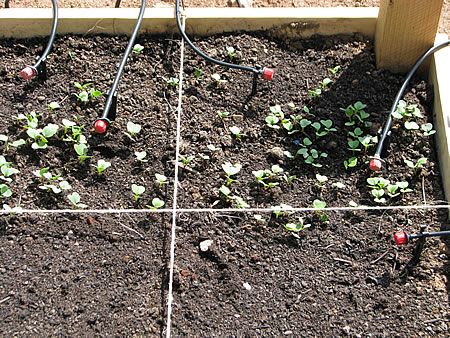
I divided the 1 square meter garden area into 9 equal areas.
To make the division, I used twine and nails.
I measured, using a metre, each side and placed nails at equal distances to divide it into three parts.
Each side needs 2 nails.
The first one at 33.3 cm. The second at 66.6 cm.
I spread the twine from nail tonail.
Finally, the following shape was created, dividing the garden into 9 equal areas/parts.

I took a marker and labeled the horizontal and vertical sides of the garden.
I wrote A, B, C on the horizontal and I, II, III on the vertical.
Now, each area has a name: A1, B3, C1, etc, like an Excel’s spreadsheet cells!
I sow the raised garden
Sowing with the help of the 9 regions was a simple and fun task.
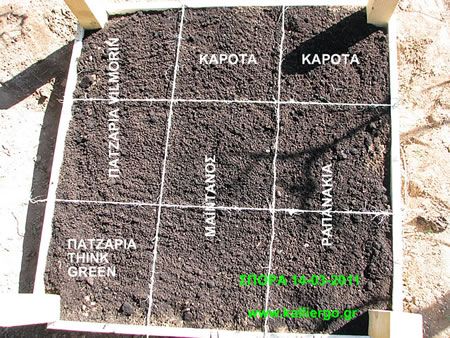
I sowed the following:
- Radishes: Areas C1 and C2
- Carrots: Areas B3 and C3
- Parsley: Areas B1 and B2
- Beetroot (2 varieties): Areas A1, A2 and A3
Automatic watering
If you live next to the garden all the time, then you can skip this part. But if you are away and want your garden to be automatically watered, you will find this interesting.
Because I’m not always near my garden, I had to install an automatic watering system so that the watering can be done by itself.
Initially, I opted to use drip irrigation as I do throughout the regular garden.
I set up my hoses and put in extensions that ended in drippers.

DON’T DO IT. IT DOES NOT WATER EFFECTIVELY!
The drippers worked normally. But they do not manage to water the whole surface satisfactorily. Some parts of the raised garden were watered a lot and others not at all.
Another more effective solution had to be found.
The solution was to use 180-degree angled sprayers.
I used just 2 180 degree angle wetting jets. I placed them opposite each other so that each one covered the area left uncovered by the other.
We place the angled wetting jets opposite each other
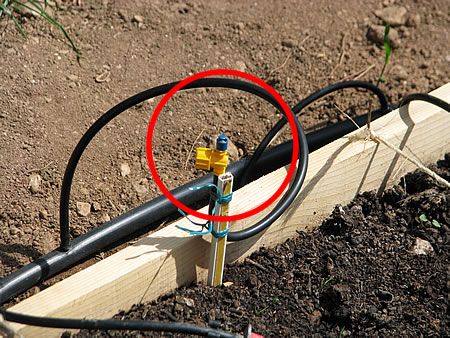
180-degree angled wetting jet
The result was perfect. The whole artificial garden was now watered normally.
I kept the drippers though (after closing them first). I kept them because it was more trouble to take them out than to keep them.
Results
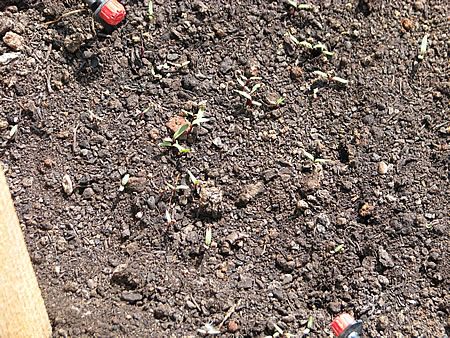
The results of the one square meter raised garden so far have been impressive.
Everything I have sown is growing regularly and quickly.
I sowed carrots in the raised garden and the regular garden on the same day.
The carrots in the raised garden appeared first (a week apart).
Radishes in the 1 square meter garden
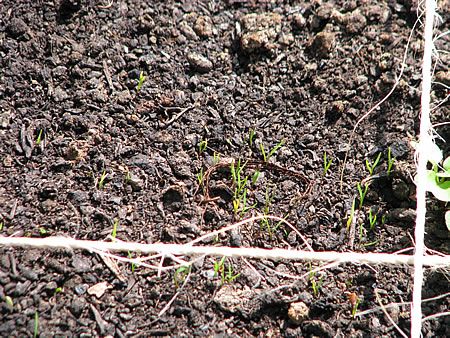
Carrots in the 1 square meter garden
Beetroot in the 1 square meter garden
Tags: 1sqm garden • BALCONY • CITY • CONSTRUCTION • DIY • GARDEN • I MAKE • SOW