2010 is the first time I tried to make my own grapes wine. I will try to convey my experience to you. To tell you what I did right and what I did wrong.
This article focuses mainly on the mistakes I made trying to make homemade grapes wine for the first time.
The following year I did much better. I recommend that after reading this article, you also read the detailed article about it: “How to make home wine from grapes. Step by step guide and equipment used”.
Of the 130 liters of must I produced from the vines on the garden, I threw away the 70 liters during the vinification process, 30 liters became vinegar and only 30 liters turned into wine.
Before I started the efforts I tried to get information via the Internet. I read as many articles as I could find on how to make homemade wine.
In theory, everything was simple. The steps were clear. Success was guaranteed. But theory is one thing and practice is another.
“What I understood from this first experience is that each must is unique and should be treated as unique. On the Internet you will find very good articles on how to make your own wine. The steps are pretty much the same.
What makes the difference between success and failure, wine or vinegar, is when we take each step. The times are different and depend on the properties of the must.”
The main property we are interested in is the sugars in the must.
Let me remind you at this point that the must becomes wine when the sugars it contains are converted into alcohol (alcoholic fermentation). Simply put, we can say that the sweeter the must, the stronger (high alcohol content) the wine will become.
Baumé degrees
We measure the sugar content of the must in order to calculate the alcohol content of the final wine. The measurement is made in degrees Baumé, using an instrument that is immersed in the must and is called a mustmeter. The Baumé degrees measured correspond to the degrees of alcohol that will be obtained after alcoholic fermentation is complete. The instrument gives us this ratio directly.
I’ll start with the Baumé degrees because from what I understand they are the key to deciding when your wine is ready. That is, when the must has become wine.
When the must has become wine and you can seal it?
The must has become wine when dipping the mustmeter into it, shows us that the Baumé degrees are zero. This means that all the sugars have been converted to alcohol and therefore you can seal your wine to let it mature. This is what I learned from destroying 100 liters of must!
The wine is ready to be sealed when the Baumé degrees are zero. Not in 10, not in 20, not in 40 days There is no rule based on days count. When the Baumé degrees are zero, whenever that happens. That’s why you should measure the must regularly to see when that time arrives.
Making my homemade wine
- I picked the grapes
- I extracted the must from the grapes
- I put the must into an open-top stainless steel tank to do the alcoholic fermentation
- I removed the sludge that has settled at the bottom of the tank
- I sealed the wine to let it mature
1. I picked the grapes
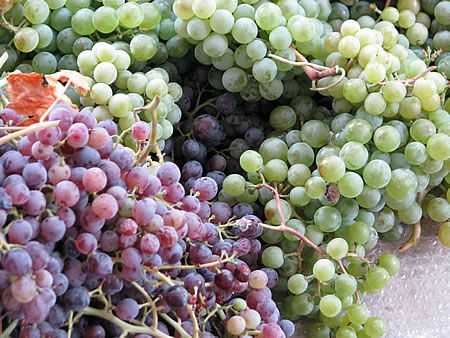
Gathered grapes, ready to be made into must
When the grapes were ripe, I picked them. I made sure to remove the grape berries that were in trouble. I could lay the picked grape berries in the sun for a few days to increase their sugar levels (water evaporates and sugar concentration increases). This is good to do if you know that your vines yield grapes that are low in sugar. Alternatively, you can add sugar to the must.
2. I took the must out of the grapes by crushing
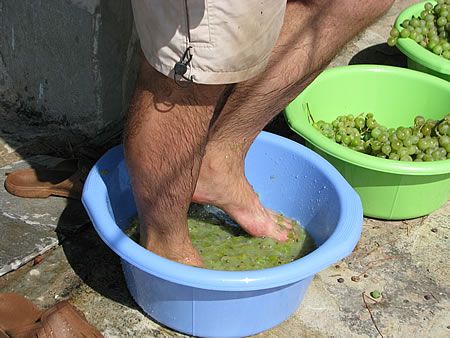
I crush the grapes. Small production, small resources…
I crushed the grapes in basins (small production, small resources…), in order to break the grape rinds and extract the juice (must). Instead of crushing the grapes by foot, you can buy a special machine that makes the crushing of the grape rinds.
Depending on the color you want your wine to be, you have two paths to take.
Must for white wine
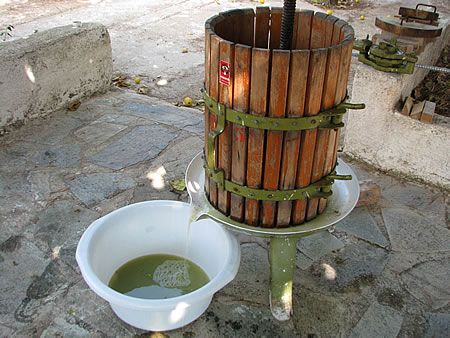
Must for white wine – Grapes press
If you want to make white wine, immediately remove the must from the crushed grapes. For best results and to get all the must, use a grape press to squeeze all the must out of the crushed grapes. Store the must directly into the container where the alcoholic fermentation will take place.
Must for rosé – red wine
Must with grape rinds and stems

Must for rosé-red wine
If you want to make rosé or red wine, leave the must with the grape rinds in a container for 2 to 3 days. Stir several times during this time. You will see that the must will turn a rosy red color. Make sure that the stems are completely soaked in the liquid so that no fungi can grow. In this way, the tannins from the grape rinds will be transferred to the must and it will gain a color towards red. For best results and to get all the must, use a grape press to squeeze the crushed grapes. Put the must directly into the container where the alcoholic fermentation will take place.
3. I put the must into an open-top stainless steel container for alcoholic fermentation
Where can you put the must? You have 3 options.
- Wooden Barrel
- Stainless steel INOX vessel (closed or open type)
- Plastic Barrel
As a beginner, I chose the open-type stainless steel container. Stainless steel containers have many advantages due to their material of construction (stainless steel). Essentially unlimited shelf life. They do not leak. They are relatively easy to transport and clean. Made of a material that is inert in contact with its contents.
There are 4 types of stainless steel containers.
- With screw cap (suitable for olives rather than wine)
- Open type with a simple float (for amateurs)
- Open type with pneumatic float (for amateurs)
- Hermetic closure (for professionals)
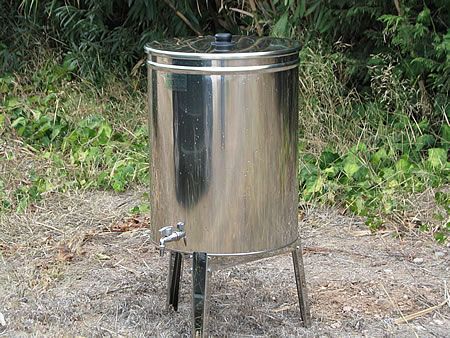
Stainless steel open-type tank. Here with its top lid. The floating lid is inside the tank and is not shown in this photo.
I bought an open-type container with a simple floating lid. What does it look like? Imagine a large stainless cylindrical container (tank). Its lid is slightly smaller in diameter than the tank. The lid goes into the tank and floats in the must. The seal (closure) is made by pouring paraffin oil between the floating lid and the walls of the stainless steel tank.
I first washed the stainless steel tank (container) very well with green soap and warm water. In all phases of wine production, cleanliness is essential.
I put the must in it and let it “boil” (alcoholic fermentation). This is where the right or wrong moves begin.
Right moves I
The must is “boiling” in the stainless steel tank as alcoholic fermentation is taking place
We leave the tank with the must open. Cover the opening with a piece of tulle so that it can be ventilated, but flies or other insects cannot get into it. During the boiling of the must (alcoholic fermentation), carbon dioxide is produced. The area where the container is located should be well ventilated.
Wrong moves I
Put a lid on the container, leaving just an opening for the must to ventilate. Do not cover the opening with a tulle. We believe that the opening is sufficient for proper aeration. I made this mistake with the first 70 liters of must. The result was the must started to smell like a rotten egg. It did not have adequate aeration and as a result it rotted and I threw it away.
Every two days we stirred the must with clean wood, which we then washed thoroughly until the next use.
Right moves II
After 7 days, we use the mustmeter to measure the sugar contents of the must. You will notice that the Baumé degrees measurement will be lower than the original one. This is because the sugars are gradually converted to alcohol.
Repeat the measurements every 3 days. The must has turned into wine when the Baumé degrees reading is zero (all the sugars have turned into alcohol). At this stage we can move on to the next step.
Wrong moves II
We do not make any measurement of the sugars with the mustmeter. We let time pass so that we reach the 40 days that most wine production articles on the Internet say our wine is ready. This is what I did with the next 30 liters of must which ended up becoming vinegar. The wine, as it was left exposed to oxygen in the atmosphere longer than it needed to be, oxidized and turned into vinegar. The good news is that I’ll have vinegar for the next 10 years.
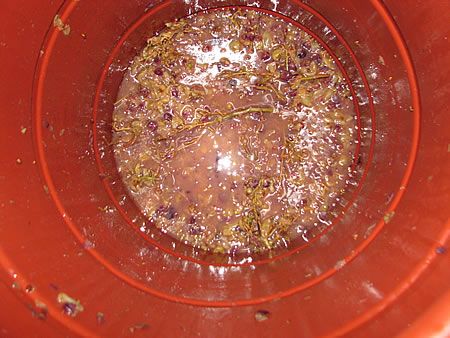
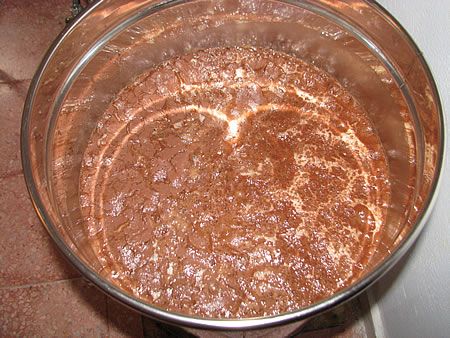
4. I removed the sludge (mud) that has settled at the bottom of the tank
Now that the must has turned into wine, it’s almost time to seal it. But before that, we need to remove the sludge (mud) that has settled to the bottom of the tank.
In practice, we do the following.
We have ready a clean empty second container of the same dimensions as the one in which the wine is stored.
We carefully transfer the wine from the original container to the auxiliary container until we reach the lower layers where the mud (sludge) is. Stop the transfer there.

Mud (sludge) at the bottom of the tank
Wash the now empty container carefully.
Transfer the wine from the auxiliary container back into the now clean container, where the wine will be stored and allowed to mature.
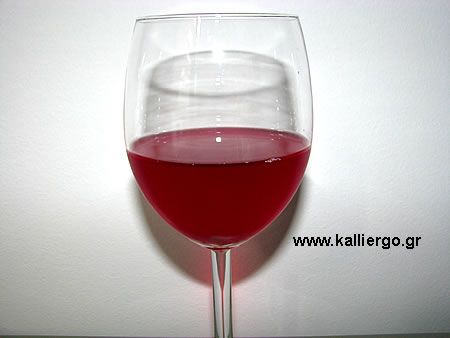
5. I have sealed the wine to allow it to mature
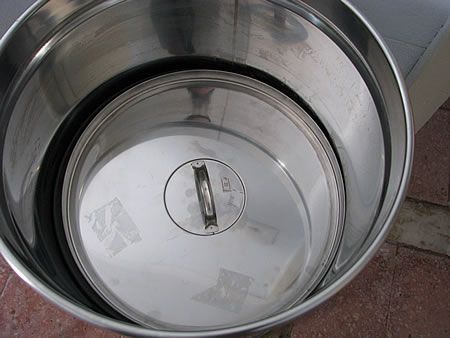
The floating lid placed on top of the wine. I put paraffin oil between the floating lid and the walls of the stainless steel tank.
This is the final stage. I place the floating lid on the surface of the wine. In the space between the floating lid and the walls of the tank, I carefully pour paraffin oil that I have bought from a pharmacy. This is also the closure of the wine. From here on, we leave it closed for about 2 months. In between, you can carefully open the cannula at the base of the container and taste your wine.
Useful links on how to make homemade wine
This article does not aspire to teach you the secrets of how to make homemade wine. Far from it. It simply conveys my own experience.
On the Internet you will find useful articles and websites with information on how to make wine.
For example:
How to make home wine from grapes. Step by step guide and equipment used
Tags: CULTIVATE • DIY • HOMEMADE WINE • I MAKE • MUST (GRAPE JUICE) • MUSTMETER • VINEGAR • WINE