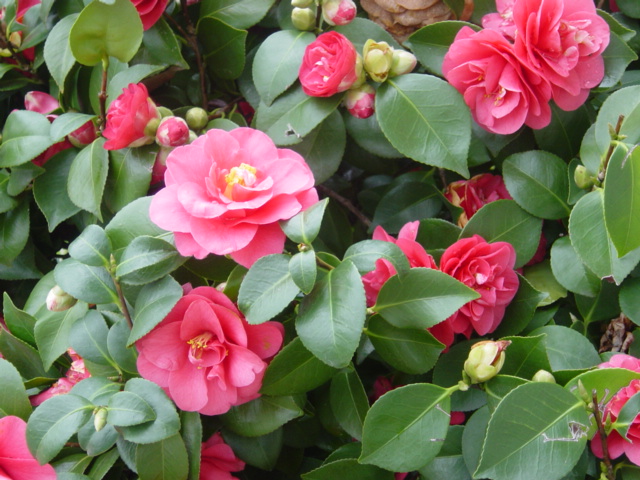
Queens of the winter flowers, Camellias are attractive evergreen shrubs that are highly prized for the beauty of their exquisite blooms, their splendid evergreen foliage and their compact shapely habit. Blooming prodigiously for weeks from fall to spring (depending on climate and variety), when the rest of the garden offers little, Camellias are ranked as one of the very best flowering shrubs.
A common myth about Camellias is that they are very fussy and difficult to grow. This is not true. Camellias are exceptionally care-free plants if they are given a well-chosen site. Here are some basic rules that need to be followed to enjoy their splendid flowers.
Select the right site for your camellias
Camellias thrive in temperate climates and are hardy to zones 6-9.
Camellias are best grown in consistently moist, slightly acidic, organically rich, well-drained soils, similarly to azaleas and rhododendrons.
Test your soil’s pH level before planting. A pH of 5.5 to 6.5 is ideal.
Camellias thrive in part shade. Protect them from the early morning sun which would scorch the blooms still soaked with dew. Protect them also from the direct hot summer afternoon sun. Older camellia plants can thrive in full sun when they are mature enough to have their roots shaded by a dense canopy of leaves.
Provide a site sheltered from cold, dry winds as buds and flowers may be damaged by cold winds.
Planting your camellia
Best planting time is when your Camellia is blooming and its roots are more or less dormant. However, spring planting, rather than fall, is recommended for northern areas because it gives the plant more time to get established before hard freezes.
Dig a hole twice as wide as the root ball to allow the roots to branch out. Your hole needs to be the same depth as the root ball so that your Camellia is not planted deeper than it was in the pot. This is very important as you do not want to suffocate your Camellia.
If your Camellia is potbound with its roots growing in circles around the inside of the pot, make 2-3 vertical slashes with a sharp knife, about 1/2 in. deep (1 cm), from the top to bottom of the root ball.
Set your Camellia in the hole, holding it by the rootball and not by the stem, making sure that the top of the root ball is at the same level as it was in the pot.
Add compost, peat moss or ground bark to the dug up soil to provide a smooth transition between your Camellia’s potted conditions and its new home.
Mix and fill your hole until the root ball is covered. Press down gently (do not trample!) to keep the plant in place.
Water generously and mulch away from the plant stem with leaves or shredded bark to retain moisture and suppress weeds.
Aftercare for camellias
Camellias cannot withstand prolonged drought. Watering regularly and deeply is vital, particularly during the growing season and in fall when the flower buds are forming.
Fertilizing is not really necessary and can be damaging if not done properly. Artificial fertilizers tend to be too strong. Excessive or late feeding can lead to bud drop. If your soil is adequate, simply provide an annual mulch of old manure or compost. Top it up in summer if required. You may also sprinkle some blood and bone on the top of the mulch in early spring (before the growth starts) and in early fall (when flower buds are forming).
Pruning is rarely needed as most plants develop an attractive shape without pruning. If deemed necessary, pruning should be done just after blooming to avoid removing next year’s flower buds. To make your Camellia shrub more bushy, cut stems back to just above last year’s growth. While most Camellias respond well to pruning, please note that Camellia reticulata varieties do not.
Camellias are susceptible to some viruses and fungal diseases. 2 diseases can be fatal, Root rot fungus and camellia petal blight.
Root rot fungus can be a problem in warm climates. The best way to avoid it is to make sure that your soil is perfectly drained. If your Camellia is affected, apply a strong copper-based fungicide. While it may kill the fungus, it will take years for your shrub to recover.
Camellia petal blight (rust spots on the flowers) damages and kills the flowers. Remove any infected flowers right away (to avoid any spread of the disease) and always pick up blooms that drop to the ground. Remove and burn the mulch and replace it with a fresh one.
Camellias can be propagated from semi-ripe cuttings, hardwood cuttings, layering and grafting. Semi-ripe cuttings often root better if slightly wounded by taking a 5/8 in. (1.5 cm) strip of bark off the base of the cutting and dipping the wound in hormone rooting compound. Hardwood cuttings are taken as for semi-ripe cuttings, but between fall and late winter. They can root in three months. Layering is simple: bench a branch down to the ground and bury some of it. Make a nick or 2 in the buried section and roots will form in time. Detach the new plant from its parent.
Your camellia doesn’t bloom or losses flower buds?
These common problems can be easily avoided by providing good growing conditions:
- Water during dry spells in late summer when flower buds are forming
- Mulch with an 3-4in (7-10 cm) layer of chipped bark or leaf mold in late winter or early spring to conserve water around the roots
- Move container-grown camellias out from under the eaves of the house in late summer or fall so that they catch the rainfall
- Do not feed camellias later than the end of July, as excessive or late feeding can lead to bud drop Some natural bud drop may occur where too many buds have formed, particularly with double-flowered cultivars. This should not be excessive and is nothing to worry about
- Protect tender cultivars with a double layer of horticultural fleece in winter, as low temperatures can lead to bud drop
How to help camellias bloom
To help camellias bloom, prune them when they are in their growing season, which is in spring and in any case no later than mid-June. Pruning should be done immediately after the end of flowering and before the appearance of new buds. The correct way is to remove withered shoots and any branches that protrude from the shape we want our plant to have. We also need to thin out the inner branches to get better air circulation. On plants that have completely lost their shape or have grown too big for their space we can do a deep pruning. We spray them several times a day with water until new growth forms.
Greek name: Καμέλια.
Source: https://www.valentine.gr/camellia_gr.php, https://www.gardenia.net/guide/learn-how-to-plant-and-care-for-your-camellia