What is deep irrigation?
Deep irrigation is the way of irrigating (watering) plants in such a way that the water reaches the roots of the plant more easily, the plant is watered efficiently, saving water quantity and without losses from surface evaporation, especially in the summer months.
The problem of irrigation
In classical surface irrigation, to get the water to the roots of the plant, a significant amount of water is needed. The amount of water must be such that it can penetrate the surface layers of soil and reach the roots of the plant, where it can be absorbed and used by the plant.
The harder and coarser the soil, the greater the amount of water needed in conventional irrigation.
Many areas of Greece have difficult soils. Soils are hard, clayey, and poor in organic matter.
Water is by nature is a precious commodity and every effort should be made to ensure that there is no waste when it is used in crops or garden. Water should be respected and not wasted. Especially we, gardeners. should be very conscious of the proper practices of water use and conservation.
The personal need to search for alternative methods of irrigation (watering) arose from the following circumstances and observations:
- The soil in the area where I grow is hard and poor in organic matter.
- In the summer, the drip irrigation system I use proved to be insufficient to water the plants adequately and deeply, while keeping water costs at reasonable levels.
- The cost of water for watering the small garden becomes too high and unaffordable if I want the plants to be properly watered in the summer.
Surface irrigation
Surface irrigation is easy and can be done in many ways.
- Watering with the hose
- Drip irrigation and automatic watering system
- Flooding the cultivated area with water
If the soil is soft, rich in organic matter, well-drained and the cost of water is low, then for many this is a good solution.
Let me stress once again that if the cost of irrigation water is low, it does not mean that the value of the commodity of water is low. We must respect and take care of the consumption of water regardless of its cost. The cost of water is a fictitious measure of its value!
In the case of drip irrigation with an automatic irrigation system in a hard soil, the result of irrigation is as shown in the figure below.

Figure 1: Drip irrigation, surface irrigation
The water does not manage to reach the entire depth of the root and is limited to surface irrigation only. The root system of the plant is not evenly watered. Much of the water is wasted as it evaporates on the surface.
To get water to the entire root system of the plant, large amounts of water must be wasted.
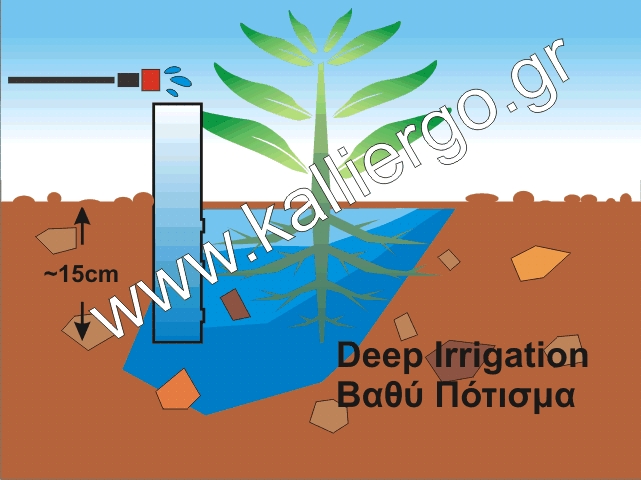
Deep watering (deep irrigation)
With deep watering our aim is to get the water quickly and easily directly to the root system of the plant.
In order to do this, we need to be able to water the root of the plant directly and not indirectly.
The easiest and most economical way to achieve this is to use a pipe placed vertically in the ground. See the next figure.
Figure 2: Root watering, deep watering
The pipe is open top and bottom. It has 3 or more holes in the part that is placed in the soil.
If you compare the two figures, you will see that in the case of deep watering, most of the water goes directly to the root of the plant. It does not stay on the surface. This is a very big improvement in irrigation efficiency and water utilization.
Construction of deep irrigation pipes
I bought PVC drainage pipes with an outer diameter of Φ63mm (inner diameter of Φ57mm).
These pipes are 3 meters long and cost from 4.00 to 4.50 Euros.
In store, I asked them to cut them in half so that they could fit in the car.
At this stage I had 1.5 meter long pipes.
I decided to cut each pipe at 30 cm intervals.
The top 15 cm of pipes would be in the ground and the 15 cm outside.
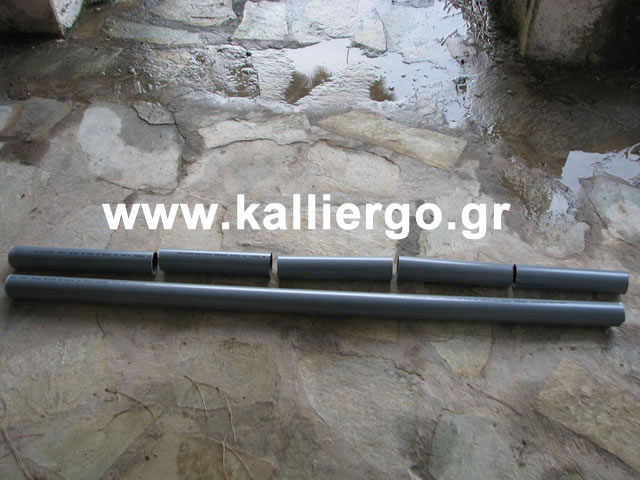
Photo 1: Cut the plastic pipe into 30 cm sections
I cut the PVC plastic pipes with the help of a hacksaw. The cutting was easy.
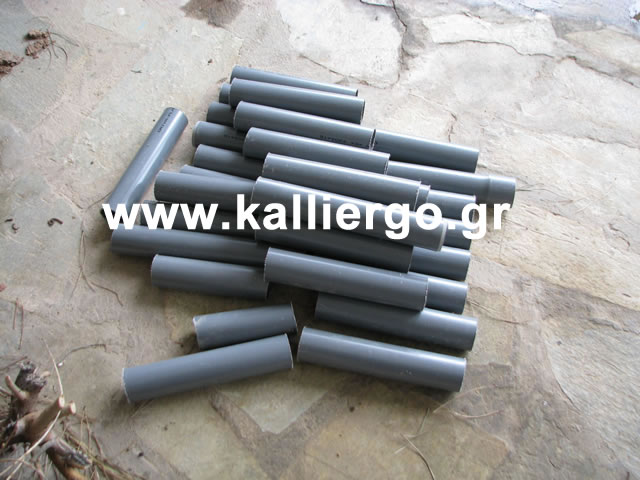
Photo 2: The three 3m drainage pipes were cut to 30 irrigation pipes
I drilled holes in only one side. The side facing the plant. Water will come out of these holes to water the plant’s roots.
To know which side of the cylinder tube has the holes and where the water will come out of, I will have to mark that side with a color.
The color should be bright. For example, red.
But in order for the paint to catch on the shiny pipe I will have to create burrs.
So with the help of a sander I create a vertical treated area.
Over this area I will drill the holes and paint the marking.
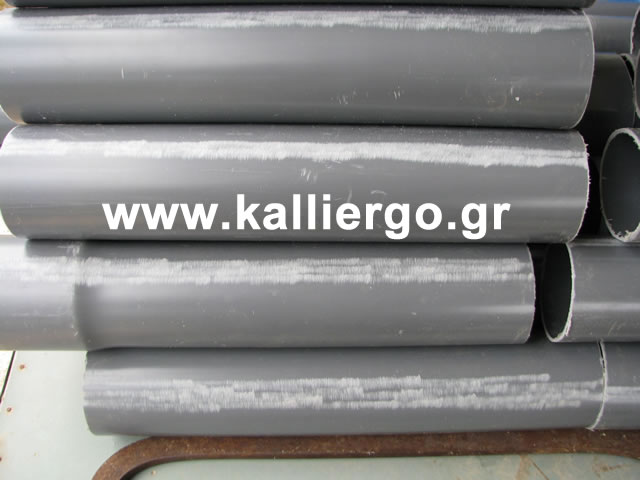
Photo 3: Detail of the pipes. The light strip is the result of the sander treatment
I drilled 3 holes in each tube. As long as water will not come out of the bottom of the tube, it will come out of these holes and water the roots.
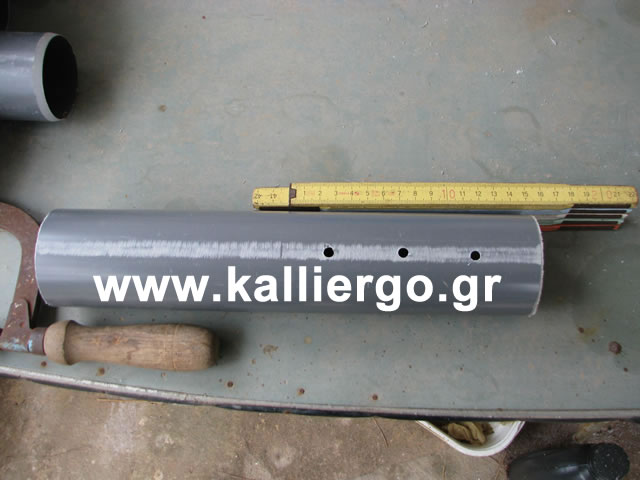
Photo 4: I drill 3 holes in the bottom of the pipe, above the marked area
I try to space the holes evenly. I drilled 3 holes.
You can drill more or less holes.
The last step is to mark the side of the pipe where the irrigation holes are.
I used red paint for the marking.
With the help of masking tape I marked the vertical area. I created a small T on the part of the pipe that I have calculated to be above the ground.
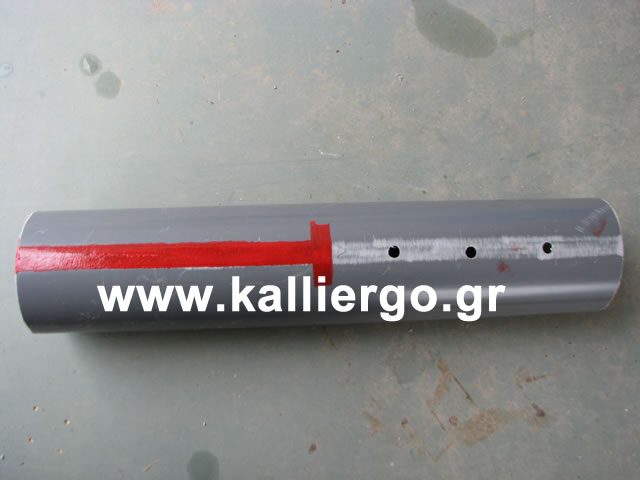
Photo 5: I mark the top of the pipe in red so I know where the holes are when the pipe is placed in the ground
Water capacity of the pipes
The water capacity of the pipes is easily calculated using the following formula:
π * r^2 * h, where:
π = 3.14
r = the radius of the inside of the pipe, or half of the inside diameter (d)
h = the height of the pipe
We know that the inside diameter of the tube (d) is 5.7 cm.
So the radius is d/2 = 5.7 cm/2 = 2.85 cm.
The height (h) of the tube is 30 cm.
Substituting we have:
π * 2.85^2 * 30 = 765 cm3 (this volume is about half the volume of a 1.5 liter bottle of soft drink)
Filling the tube twice gives the plant about 1.5 liters of water.
Filling the tube three times will give the plant about 2.3 liters of water.
If we assume that we have 20 plants to water and we water each plant 3 times, then with just 46 liters of water (20 plants * 2.3 liters/plant = 46 liters), we water all our plants. Not only that, the water will go directly to the plant’s roots. There will be no surface evaporation. Water will not be spilled left and right. It will all go to the plant.
And the best part is that we can sparse the watering intervals and save water!
Placing the pipes in the soil
I let the paint dry for several hours. The manufacturer on the label said the paint dries in 5 hours. I let it sit for more than twice that time.
The next day, using a garden trowel, I drilled holes about 15 to 18 centimeters deep. Into these I placed the watering pipes.
For me the whole effort is an experiment. I don’t know the ideal depth at which to place the pipes. I don’t know whether to get the best irrigation results, the top hole should be well below the soil surface, close to the soil surface or above it. So I experimented with various placement depths.
I placed some pipes so that the top hole was about 2-3 cm below the soil surface. Others I placed so that the top hole was close to the ground surface.
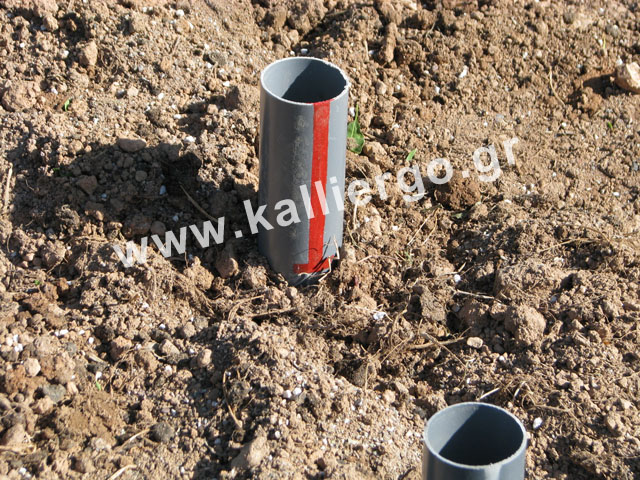
Photo 6: Placing the deep irrigation pipe in the soil
The soil was a little damp from the previous days’ rains, so drilling the holes was relatively easy and quick.
I quickly completed the placement of the pipes into the soil.
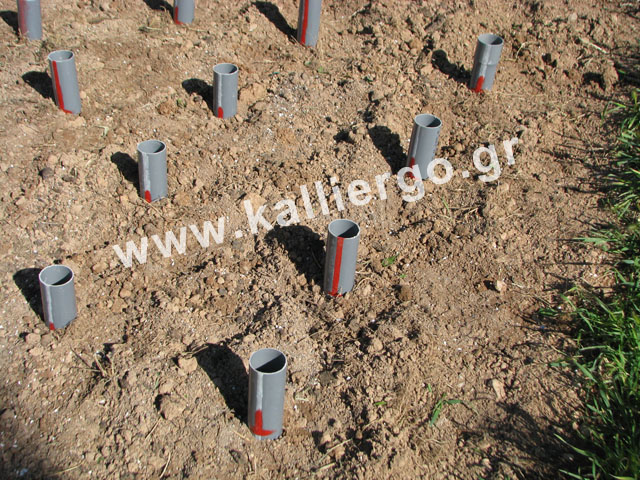
Photo 7: Partial view of the installed deep irrigation pipes
Planting the seedlings
Next, I planted the seedlings near the irrigation pipes.
I used the trowel to dig a hole (pit) aligned with the pipe holes. The perimeter of the pit was about 3- 4 cm from the pipe. When opening it, the side of the pipe with the holes was exposed, but this is not a problem because the area will be refilled with soil after planting the plant.
Until now, I wasn’t sure if the 15 cm depth was the right one. Fortunately, however, it turned out to be the ideal one! It was the ideal depth to place the seedlings. The base of the pipe, was at the same depth as the soil ball that held the root of the seedling. The top holes were above the roots of the plant.
The water coming out of the base of the pipe would properly water the roots and as it was under the roots of the young plant, it would cause them to grow downward to access the “reservoir” of water. The top holes would provide water to allow the plant’s roots to grow laterally. In theory at least, everything looks good. It remains to be proven in practice over the next few months as the plants grow.
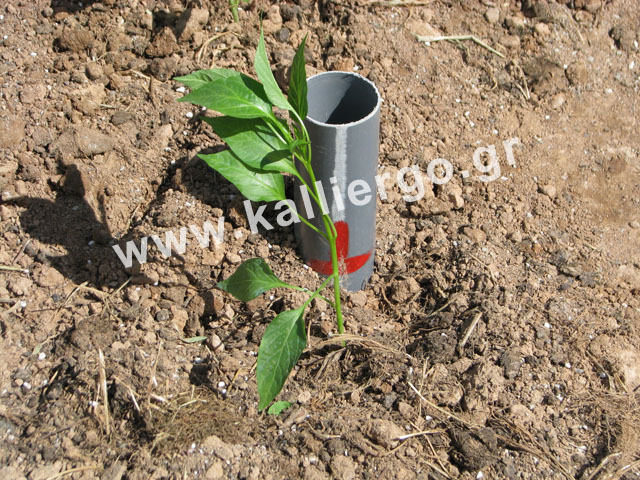
Photo 8: Planting the seedling near the deep irrigation pipe and in front of the side where the holes are
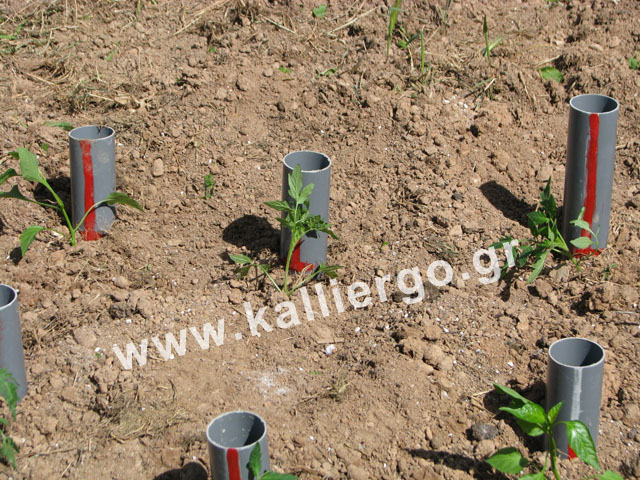
Photo 9: The seedlings planted next to the pipes
The first irrigation. The time of truth
And it was time for the test. The time for the first irrigation.
I poured water into the pipes, filling them almost to the top.
The hose emptied quickly as the water went into the soil.
I refilled the pipe.
The pipe emptied again quickly. But slower than the first time.
Third filling of the pipe and this time, the water emptied slowly as the soil was filled with water. In fact, at the bottom, it ponded for a while as the next photo shows.
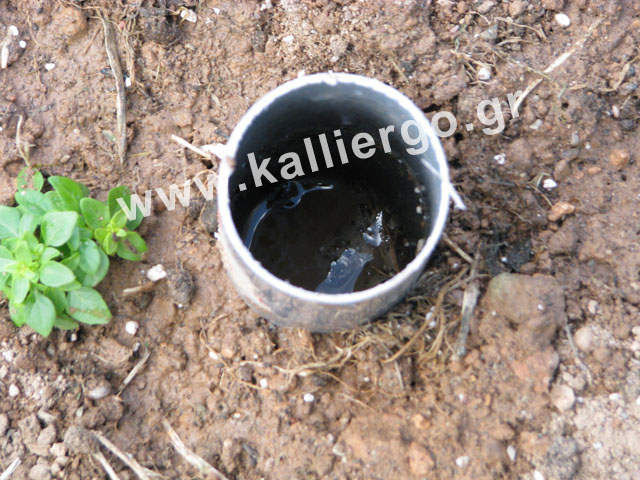
Photo 10: After three irrigations the subsoil has been filled with water and the pipe is not emptying quickly. The surface of the soil is dry
But the important thing, as you can see in the photo, is that the top of the soil is dry! All the water went straight to the roots!
Next steps
Next I need to make two additions to the system.
a) Add a plug at the top of the pipe so that there is no evaporation of the water in the pipe and no insects or lizards getting into the pipe.
b) Adjust the automatic watering system so that the drippers go into the tubes.
Epilogue
The article describes an experiment. It is in no way a suggestion for application in your own garden, nor can it guarantee the results of watering in this way.
In the coming months we will monitor the development of the plants and the effectiveness of irrigation in this way.
Tags: DEEP IRRIGATION • DEEP WATERING • DIY • IDEA • ROOT • WATERING AT THE ROOT