How do I make homemade rustic bread? A simple recipe to make your own homemade rustic bread. All you need is flour, yeast, water and salt.
Today I will show you how to make your own homemade delicious rustic bread. It’s so simple, you’ll definitely give it a try. You will inevitably make the comparisons to the bread you buy from the market bakery.
Coronavirus pandemic update – March 2020
The evolving coronavirus pandemic has changed everyone’s lives and habits.
Due to the coronavirus pandemic, this article is receiving an incredibly high number of hits.
I would like you to know that the following recipe is tried and trusted. I use it at least once a week. It makes delicious homemade rustic bread.
If you have access to sourdough, the sourdough bread recipe gives even better results in terms of taste and bread density.
In both cases, you can keep the bread in the freezer for a very long time.
The bread you make is denser and more compact than the plain bread we buy from the bakeries. Practically, one serving of this bread is the equivalent of about 3 servings of store-bought plain bread.
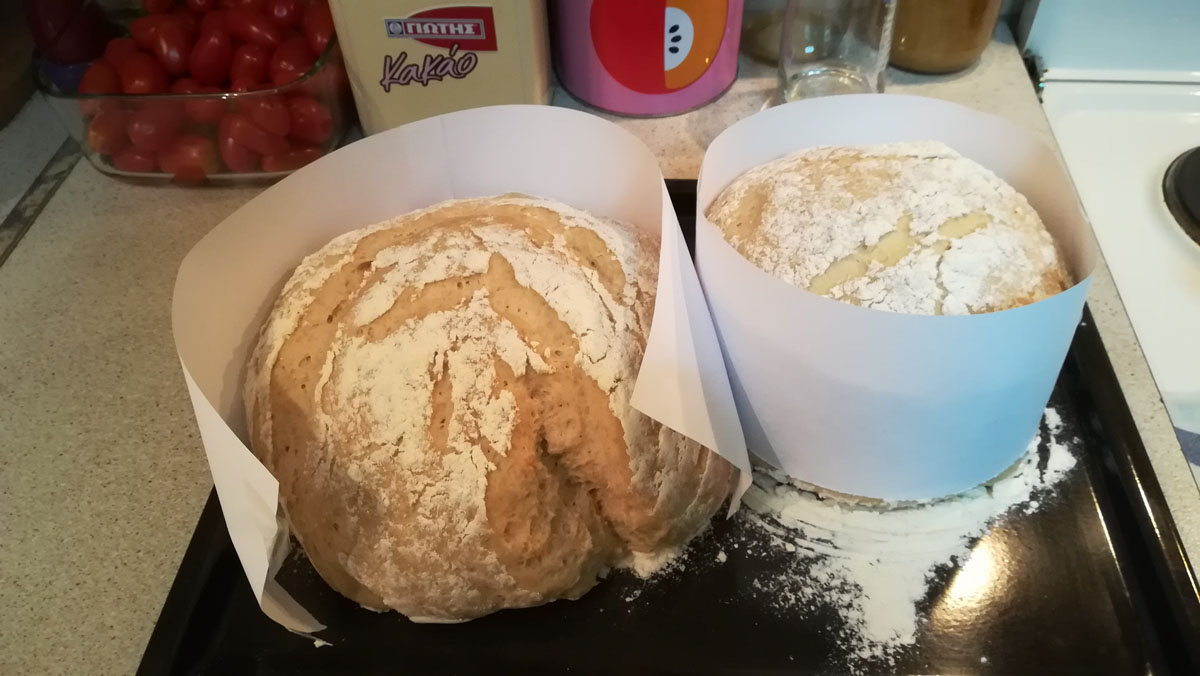
Although the bread is shown in the photos in loaf form, you can also put the dough into loaf pans.
Please buy the flour packets responsibly. There should be flour for everyone! There is no shortage of flour. We create the shortage.
Finally, a friendly word of advice, as a vice and a vice. Don’t start tasting the bread while it’s still warm. It’s so delicious you can eat it all at once without even realizing it. Ha! Ha! Ha!
Note: If you are looking for a recipe for homemade rustic bread with sourdough, see How to make homemade rustic bread with sourdough
How to make homemade rustic bread
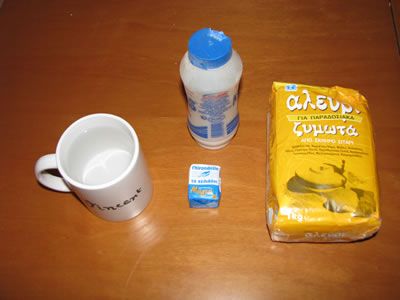
The ingredients you need to make your own delicious rustic bread are:
a) 1 kg of bread flour (in my example I use “Flour for traditional dough” from AB super market in Greece.
b) 1 cube of fresh brewer’s yeast (in my example I use “Swallow” brand from AB super market in Greece)
c) about 250+150 ml of lukewarm water
d) some salt
Rustic bread making instructions
Pour the flour into a bowl (keep about a handful of flour – we will need it later). The bowl should be twice as high as the height the flour will occupy. You can also use a baking pot instead of a bowl.
Heat about 250 ml of water to a level that is comfortably tolerable in your hand. If the water is too hot, it will burn the brewer’s yeast and render it inert. This will result in the bread not rising. So be careful of the temperature.
Pour the lukewarm water into a glass and add the brewer’s yeast. Stir until it is completely dissolved.
Pour the water-dissolved brewer’s yeast into the flour and mix well. At this stage, prepare for the mixture to stick to your fingers.
It is obvious that the flour is thirsty for more water.
So pour an additional 150 ml* or so, of hot water into the mixture and mix quickly. The water should be warmer than what you used to dissolve the brewer’s yeast, but not hot. Add enough water so that the dough is stiff. You don’t want it to be too loose.
Add salt (from 1/3 teaspoon to 1 teaspoon of salt), and continue kneading so that the salt goes all over the dough.
* The amount of water is indicative. Each kneading, it needs a different amount of water, more or less. It depends on factors such as the flour you used and the amount of flour.
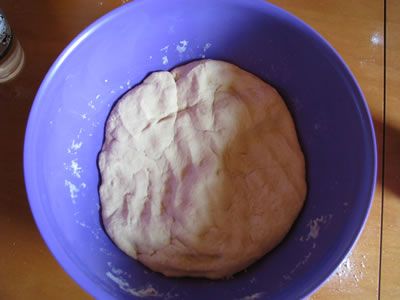
Keep kneading the traditional way. Knead the dough with your fists. Stir and knead. Knead and stir. The longer we knead, the better the dough and therefore the better our bread will be. I personally knead for at least 5 minutes, stirring the dough. The longer you knead, the more uniform and soft the dough becomes. You’ll see it in practice!
In the end, our dough will look like the following picture.
Now it’s time to let the dough rise.
Place the bowl of bread dough in a bag.
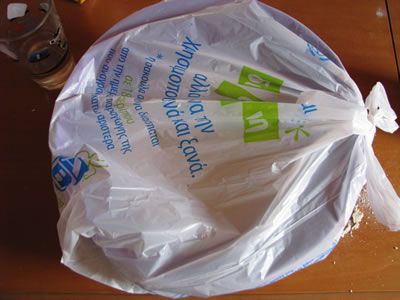
Place the bagged bowl inside a blanket and leave it in a warm part of the house (no electricity and the room is not cold).

After about half an hour and if all has gone well, remove the bowl from the blanket. If the kneading has taken place, you will know by the smell (it smells like dough) and by the increase in size of the dough (see the next picture – Compare the height the dough was before with what it is now).
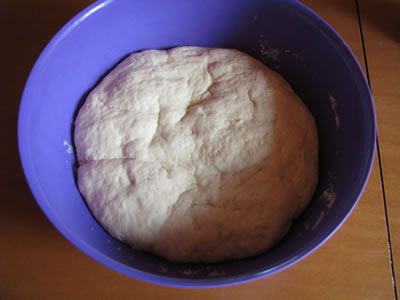
Re-leaven the dough. If it sticks to your hands, it helps to amend your hands with a little oil.
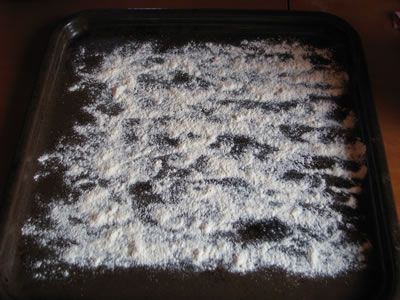
Take a baking pan and spread some of the flour you reserved in the first step. The floured pan will make the bread not stick. The dough will press against the flour instead of the metal.
Remove a small piece of dough (about 100 ml) and store it in the refrigerator. This small piece of dough will be our starter for the next bread.
If you plan to make bread again within 2 days, put it in the refrigerator, otherwise in the freezer.
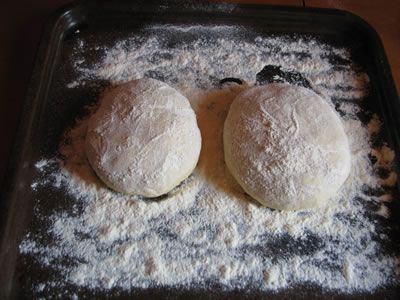
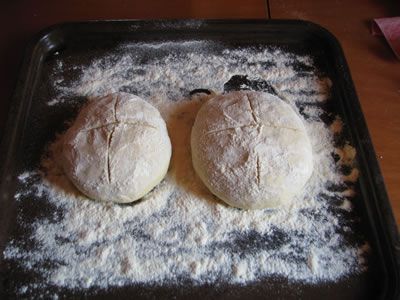
Divide the dough in half and form two balls. From these balls will come the loaves of bread.
Place the balls of dough on the floured baking sheet and move them up and down – right to left to make sure the flour between the dough and the baking sheet goes everywhere.
Take the rest of the flour and pour it over the dough balls. Spread evenly so that the flour hugs all of the dough.
Take a knife and carve a cross in each dough ball.
At this stage, turn on the oven and set it to 200 degrees Celsius (more or less).
Until the oven is hot, let the dough “rest”. During this half an hour, you will see the balls of dough grow, spread out and the cross you made earlier will turn into gaps.
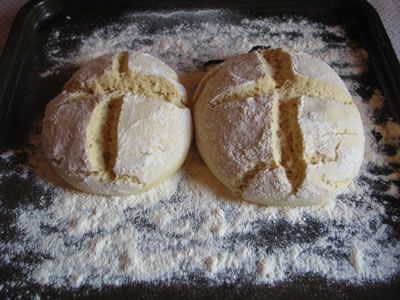
When the oven temperature reaches 200 degrees Celsius, put the baking tray in.
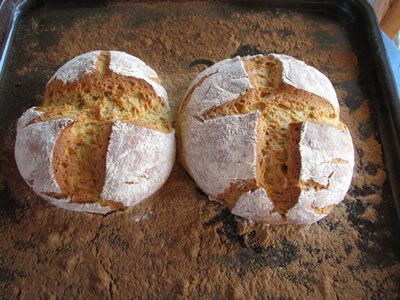
Bake for 45 minutes.
You will have the most delicious bread you have eaten in years!
NOTES
– In the first few attempts, be prepared for failure.
– The first few times you succeed in making good bread, you will find that you will find yourself eating much more bread than usual. This is normal. Enjoy its deliciousness without guilt. Accompany hot freshly baked bread, with cheese, butter, tomatoes, oil, etc. It’s so delicious…
– As you get used to it, your bread consumption will return to normal!
– Remember to say a “THANK YOU” to the farmers who grew the grains that made the flour you used. Without them, we wouldn’t have homemade, country bread…
Useful Tip
See also how to make a paper mould to make bread loaves!
Tags: BREAD • FLOUR • I MAKE • RECIPE • RUSTIC • SOURDOUGH • YEAST